
Indagator
How to build the Resonatorium
When I was sharing in-progress shots of some of the backgrounds some people thought I ripped the models from FFXIV itself (which I took as a huge compliment omg) so I thought I’d make a devlog to go into how I modelled everything (in Sketchup 2017 because I’m a cheapass)! I’m reluctant to learn new software, especially for a jam where time is limited. So I stuck with what I’m familiar with.
So to start off I took a bunch of screenshots in FFXIV to use as references. I used the instanced dungeons Castrum Abania and Ala Mhigo for most of them, but also took a few other screenshots from other areas such as my in game apartment, dressed up to look like Aulus’ room, some areas in Azys Lla (for the big green test tubes) and Rhalgr’s Reach.
I also ended up using the Gamer Escape wiki for a few more screenshots of the Resonatorium. Thank you to whoever added these.

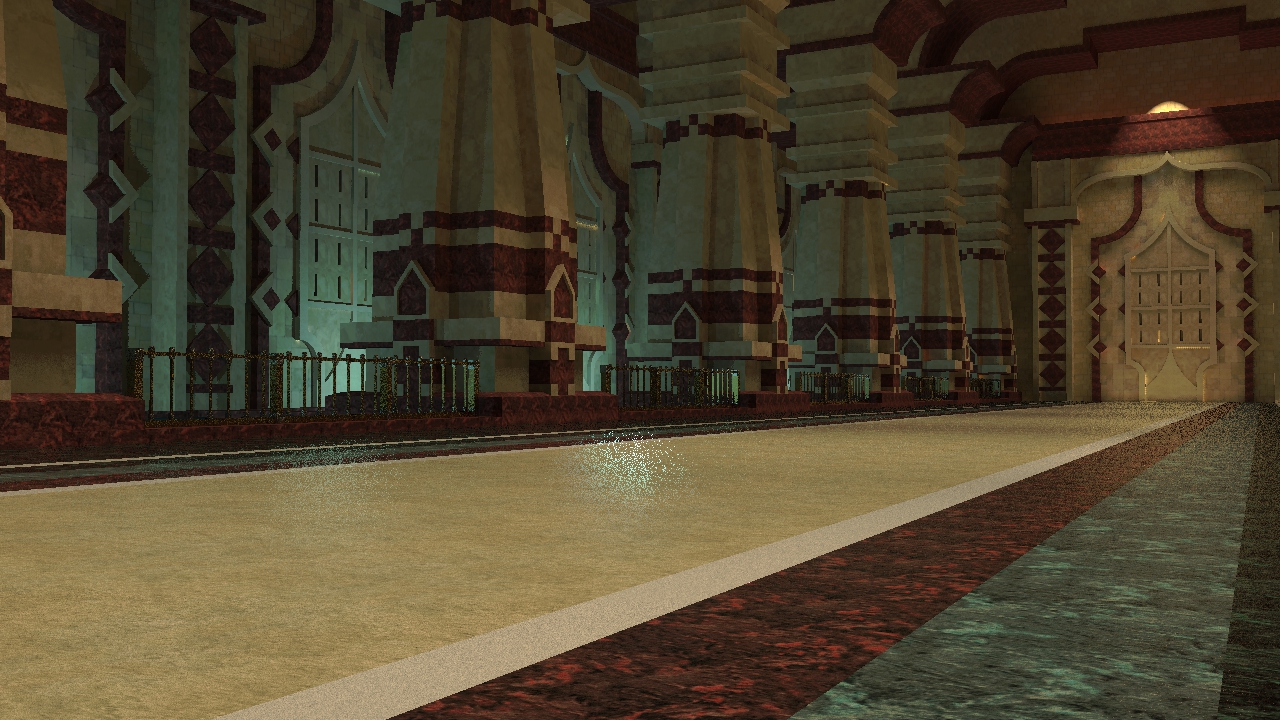
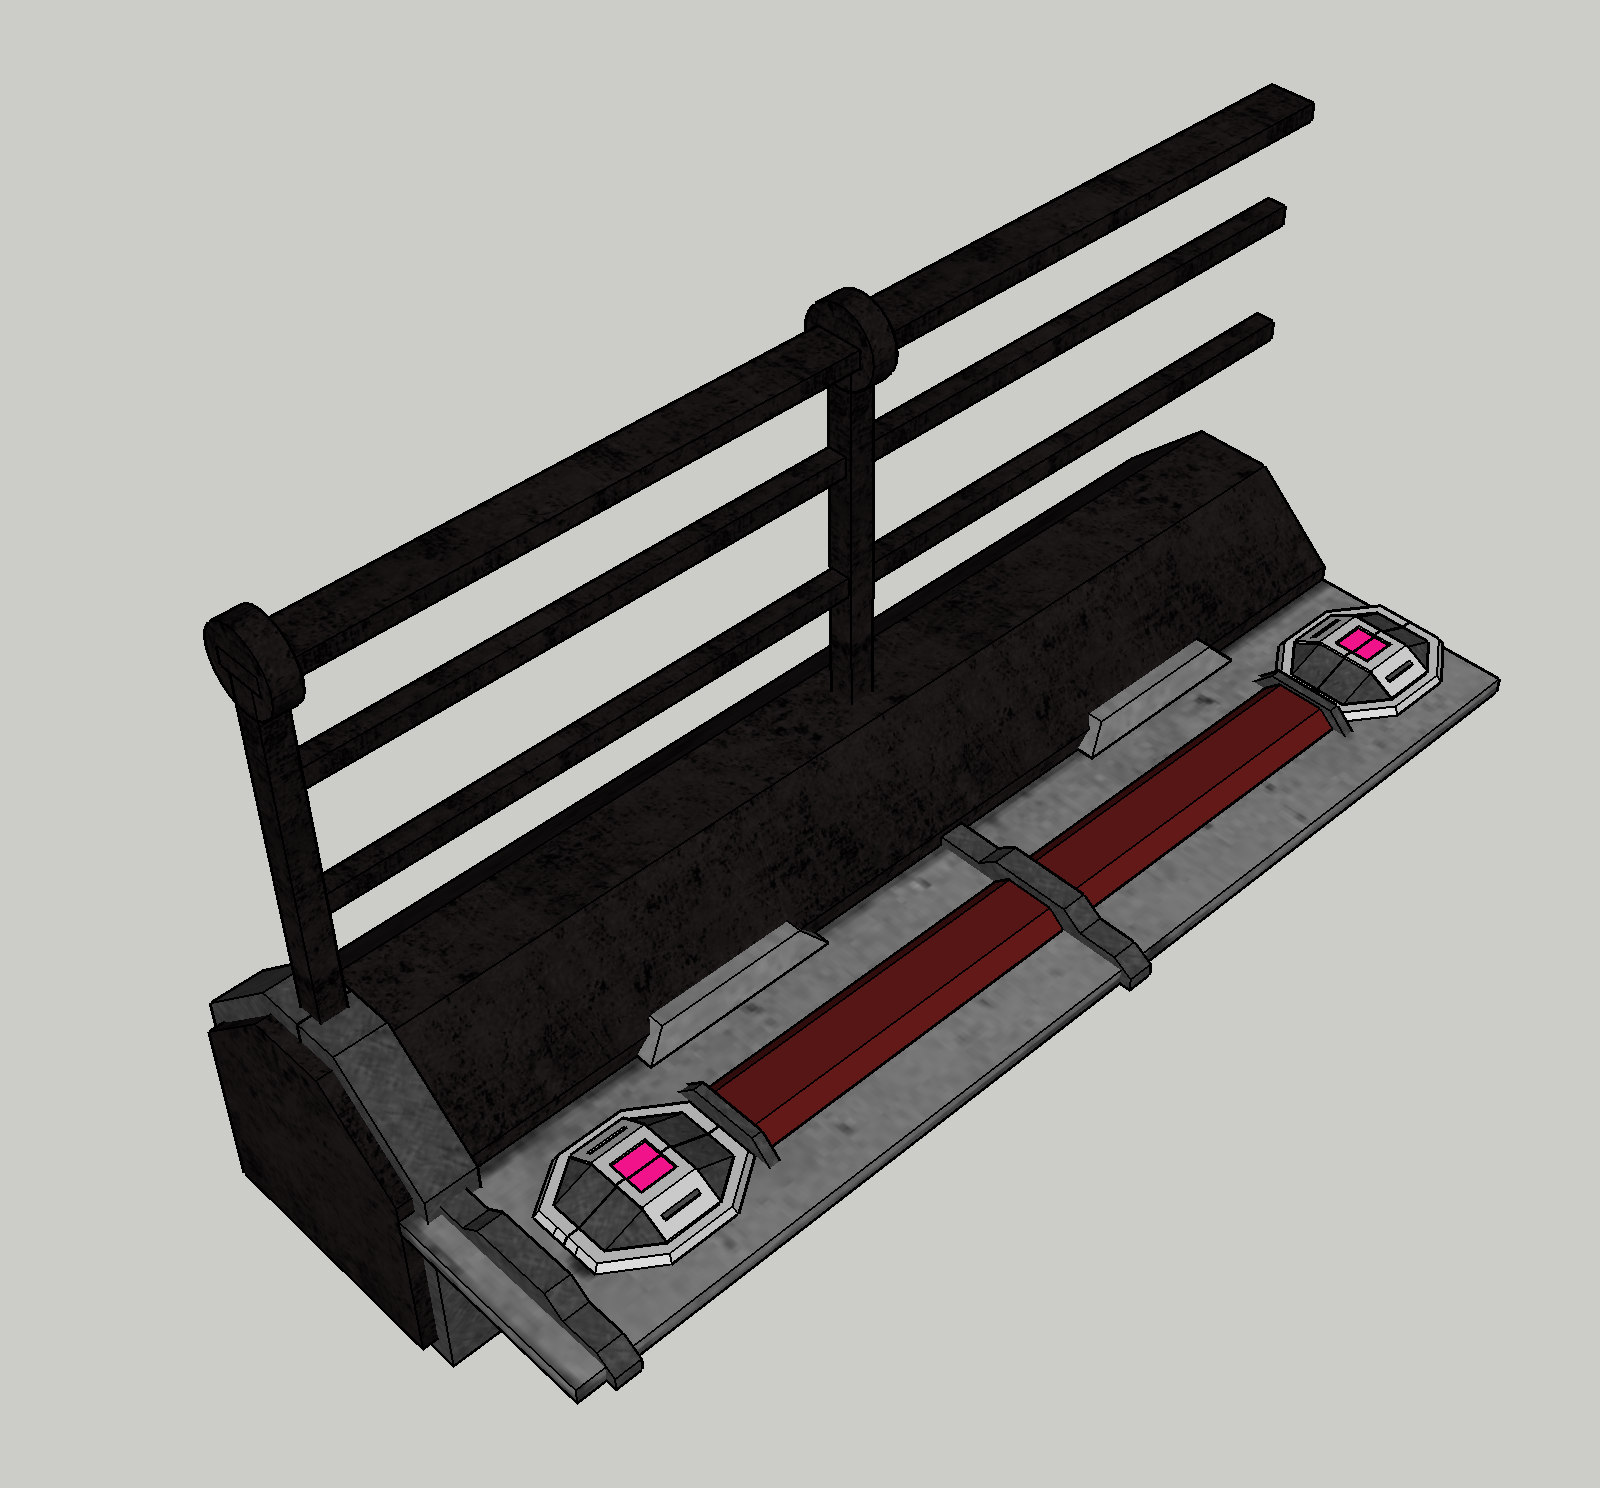
For the Ala Mhigo corridor I used this screenshot as a reference, then picked out individual components and started building from there until I had one section I could copypaste into a whole room.
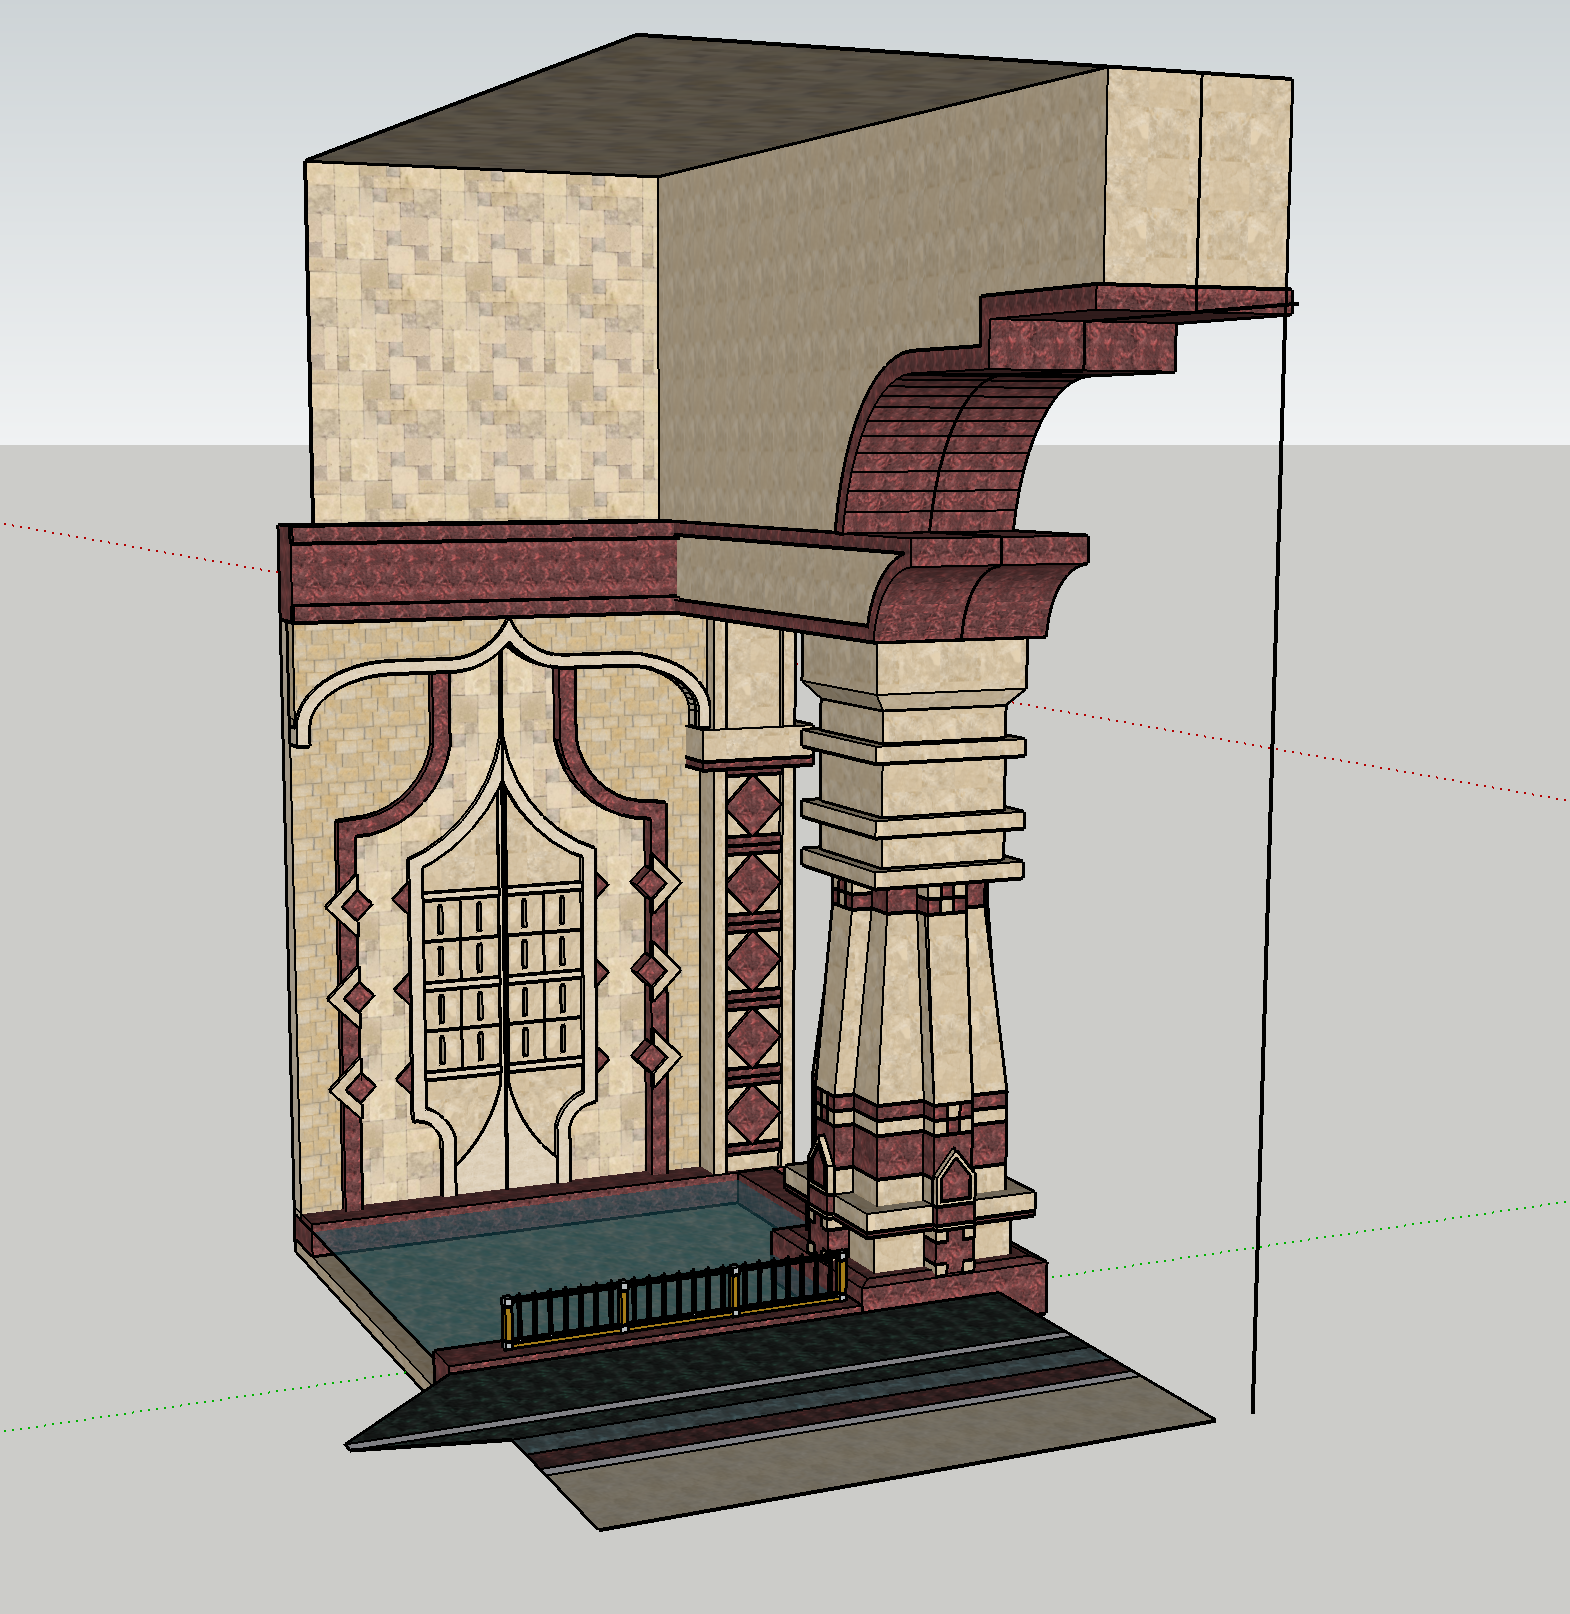
The details on the pillars were pretty fun to make. I remember staring at the big pillars with the little checkerboard details for ages trying to figure out how I would build them. I made one middle section that was a tall box with different coloured sections then built another smaller box section with the checkerboard detail and copied that onto each side. Making everything into a component helped a lot here because it meant I could make one repeated shape, edit it once, and those edits would apply to every instance of that shape without having to re-copy it over and over.
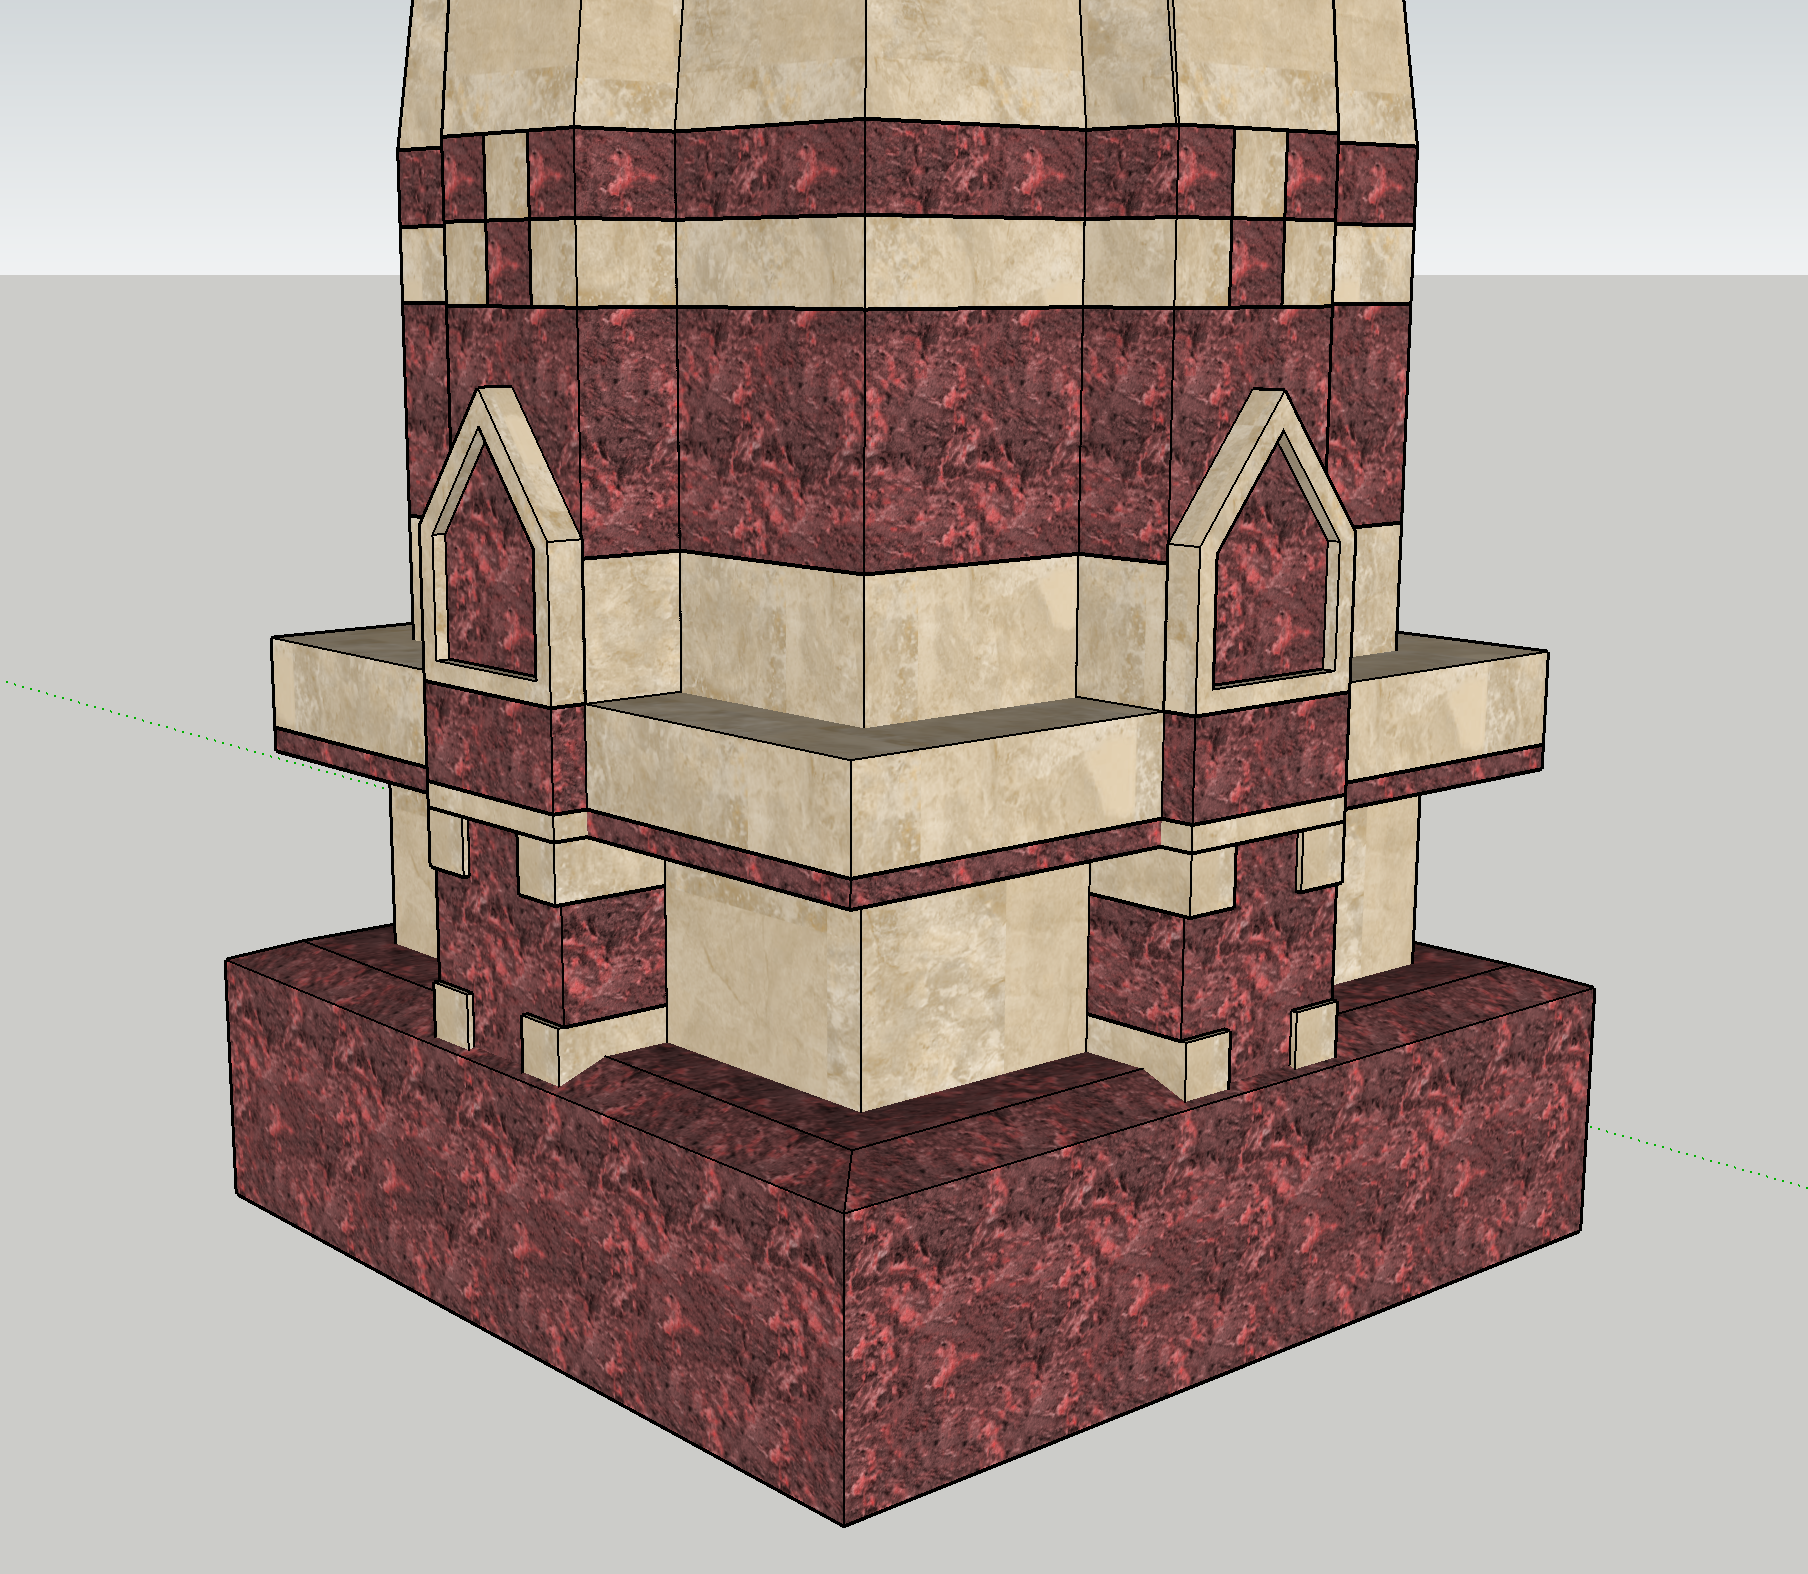

I’m glad I spent the time getting these how I wanted because I ended up reusing them for the Resonatorium lab model as well.
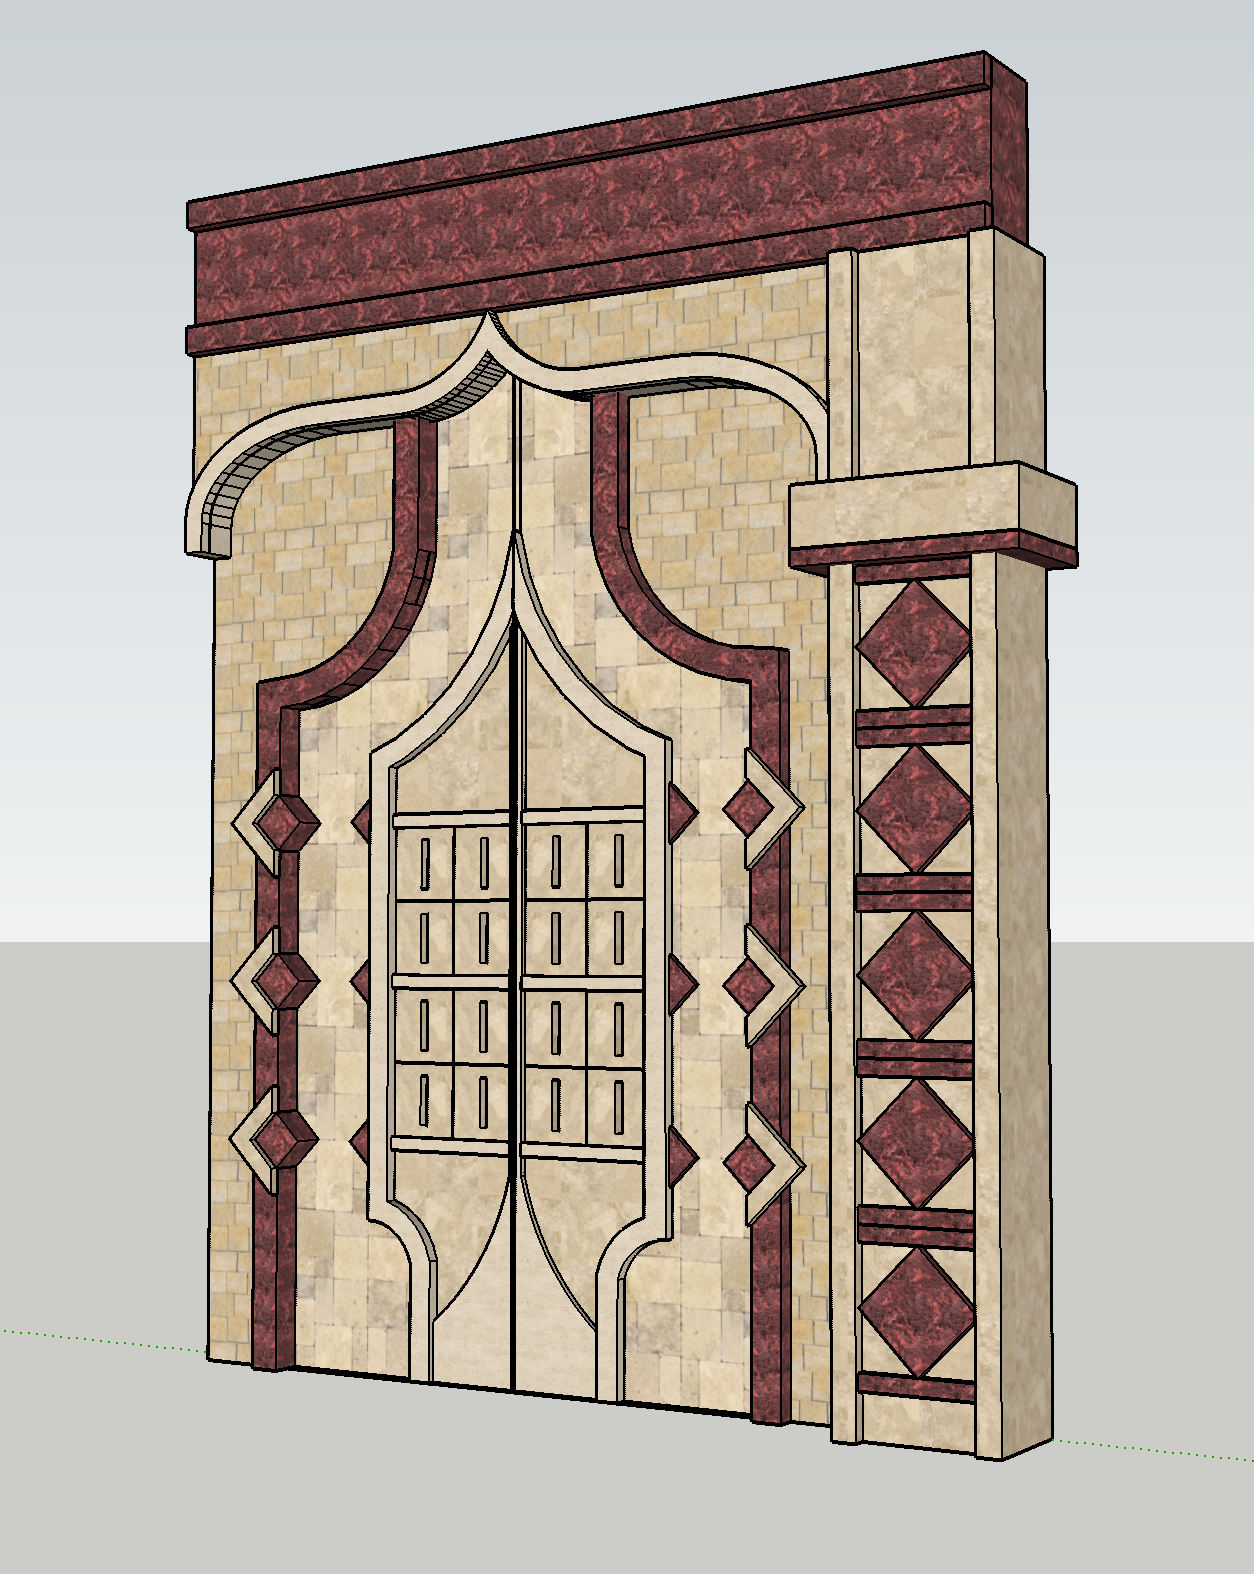
For the wall section I started drawing out all the shapes on a flat plane before extruding them to give the design the depth it has in the in-game model.
For the actual rendering I used Twilight render plugin for Sketchup. It comes with custom material and light tools. So here’s what that corridor looks like with all the lighting.
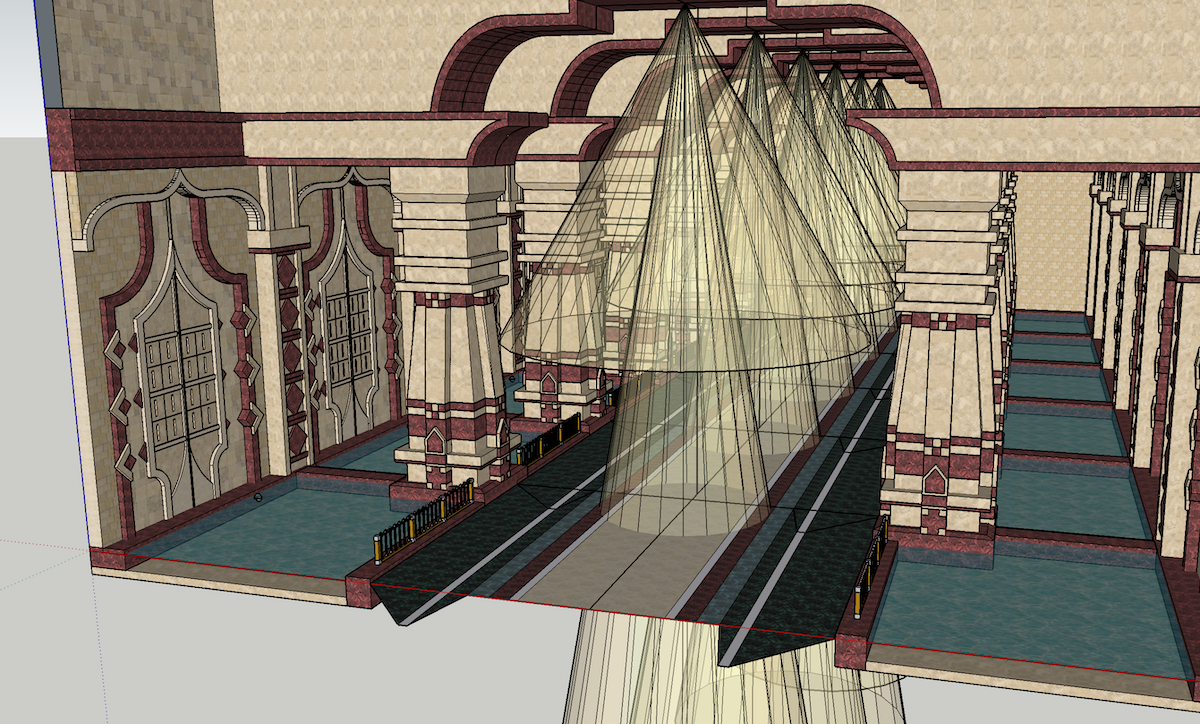
The orinal scene from the game has a lot of lanterns but I kind of ran out of steam by the time it came to adding those so I left them out and just added some spotlights way up in the ceiling and some blue ambient lights in the water at the edge of the corridor. Here’s how the preliminary render looked with all the lighting set up.
This scene was probably the easiest to light. I didn’t have to fiddle around with things much after I started rendering.
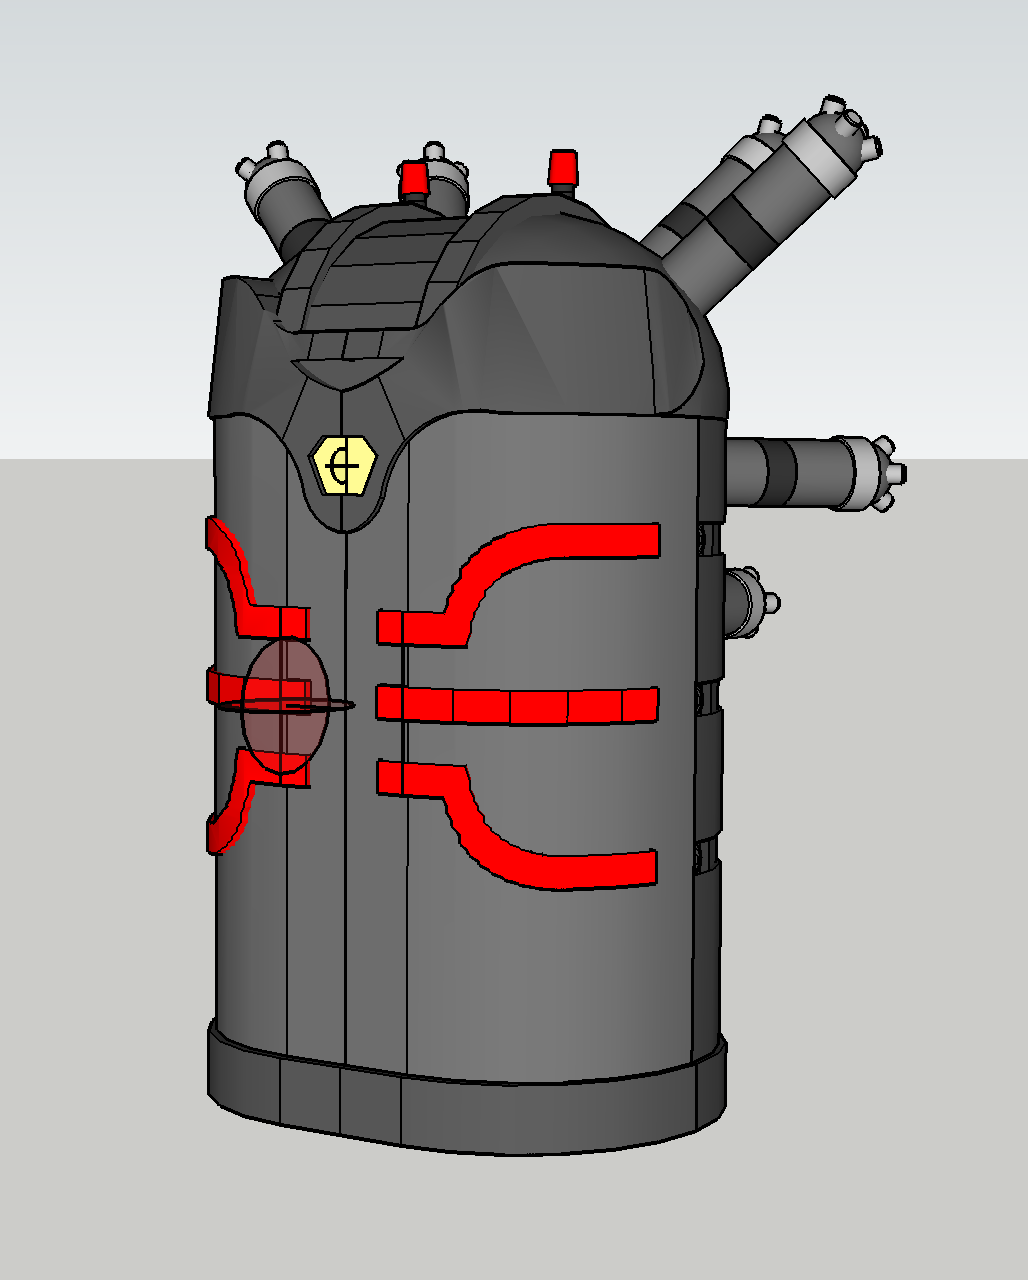
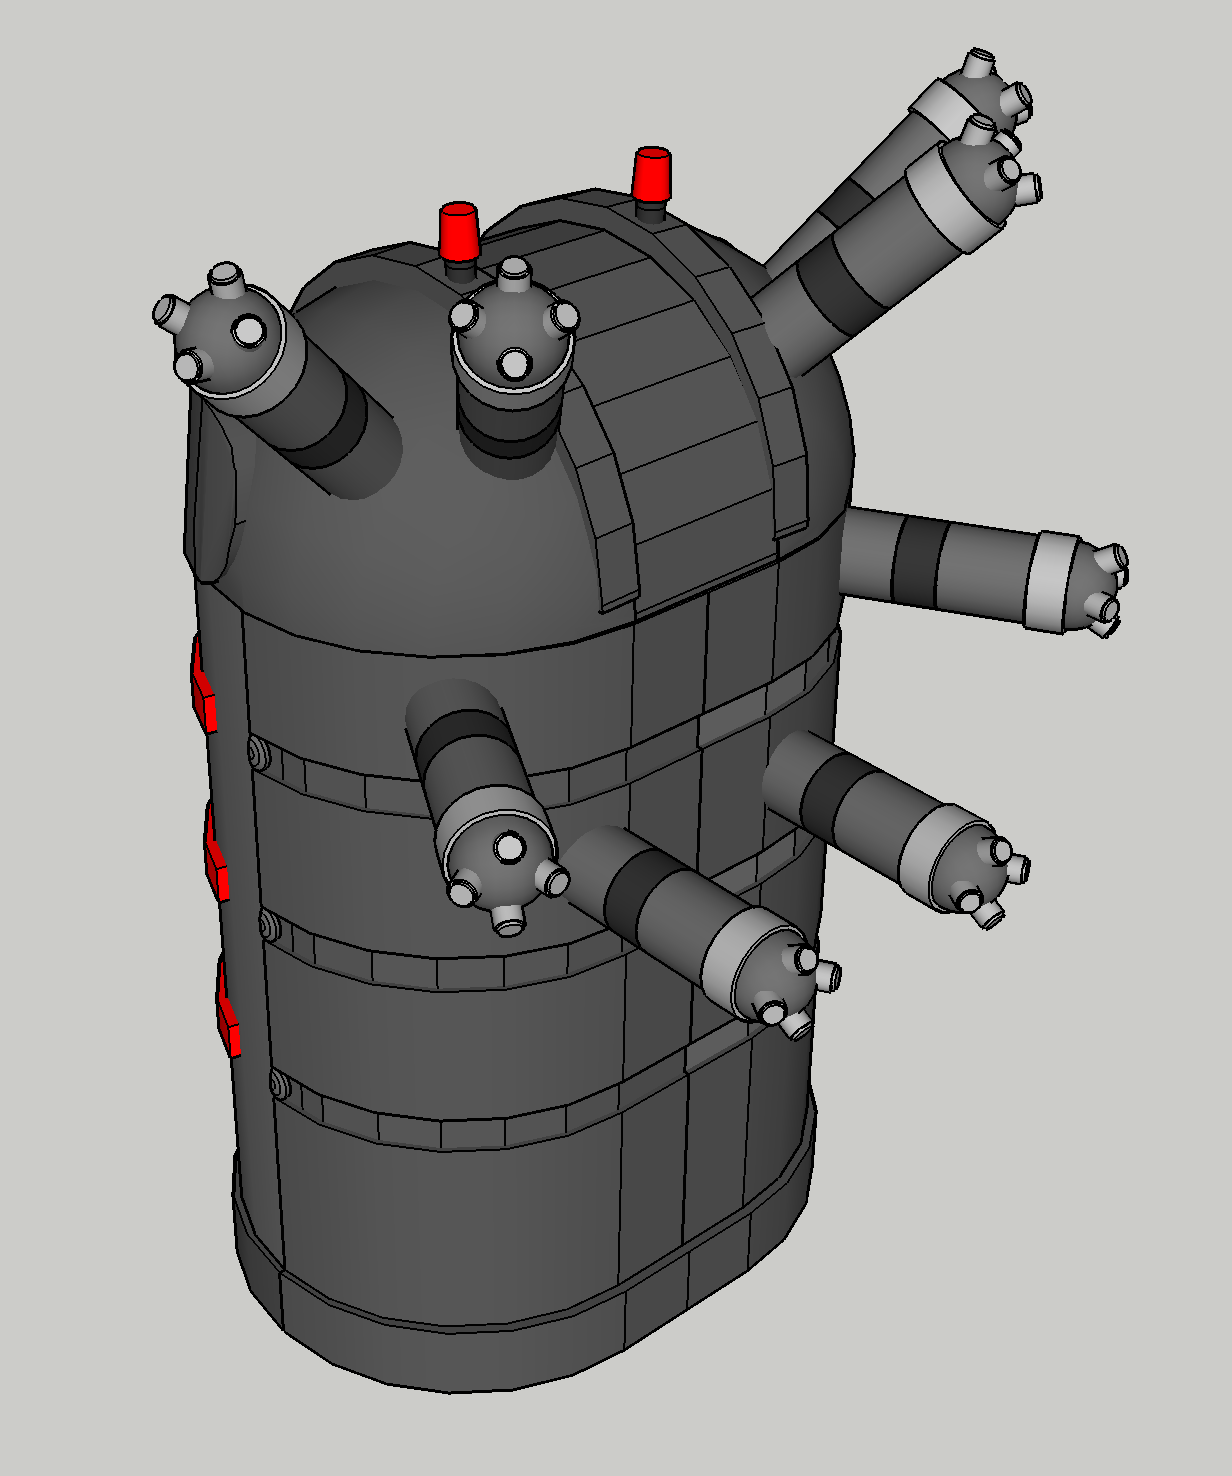
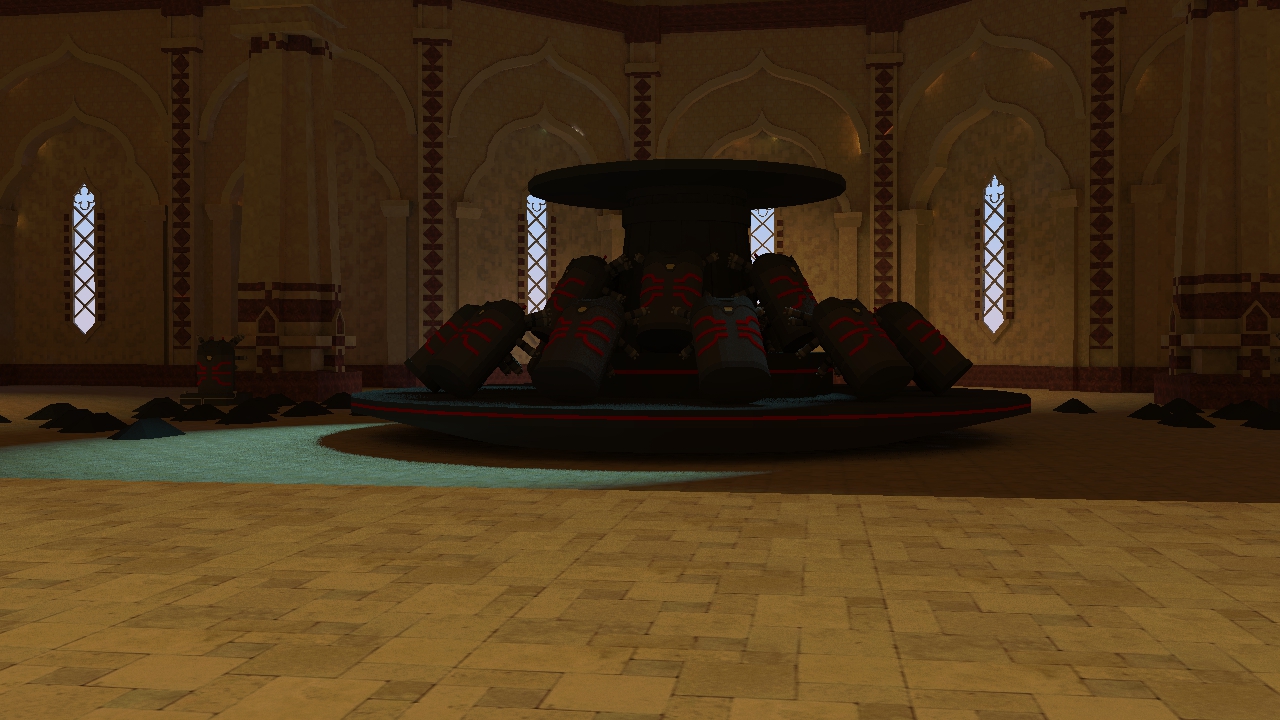
For the Resonatorium my one nemesis was always going to be those pods. If I knew blender the tools in that program would’ve made modelling them much easier but I think I did pretty good with what Sketchup could do. Some of the shapes are scruffy but it didn’t matter too much since you were never going to see them in closeup.
The wall sections were very similar to the ones in the corridor except they have a window in the centre. I was able to reuse the pillar design to go on either side.

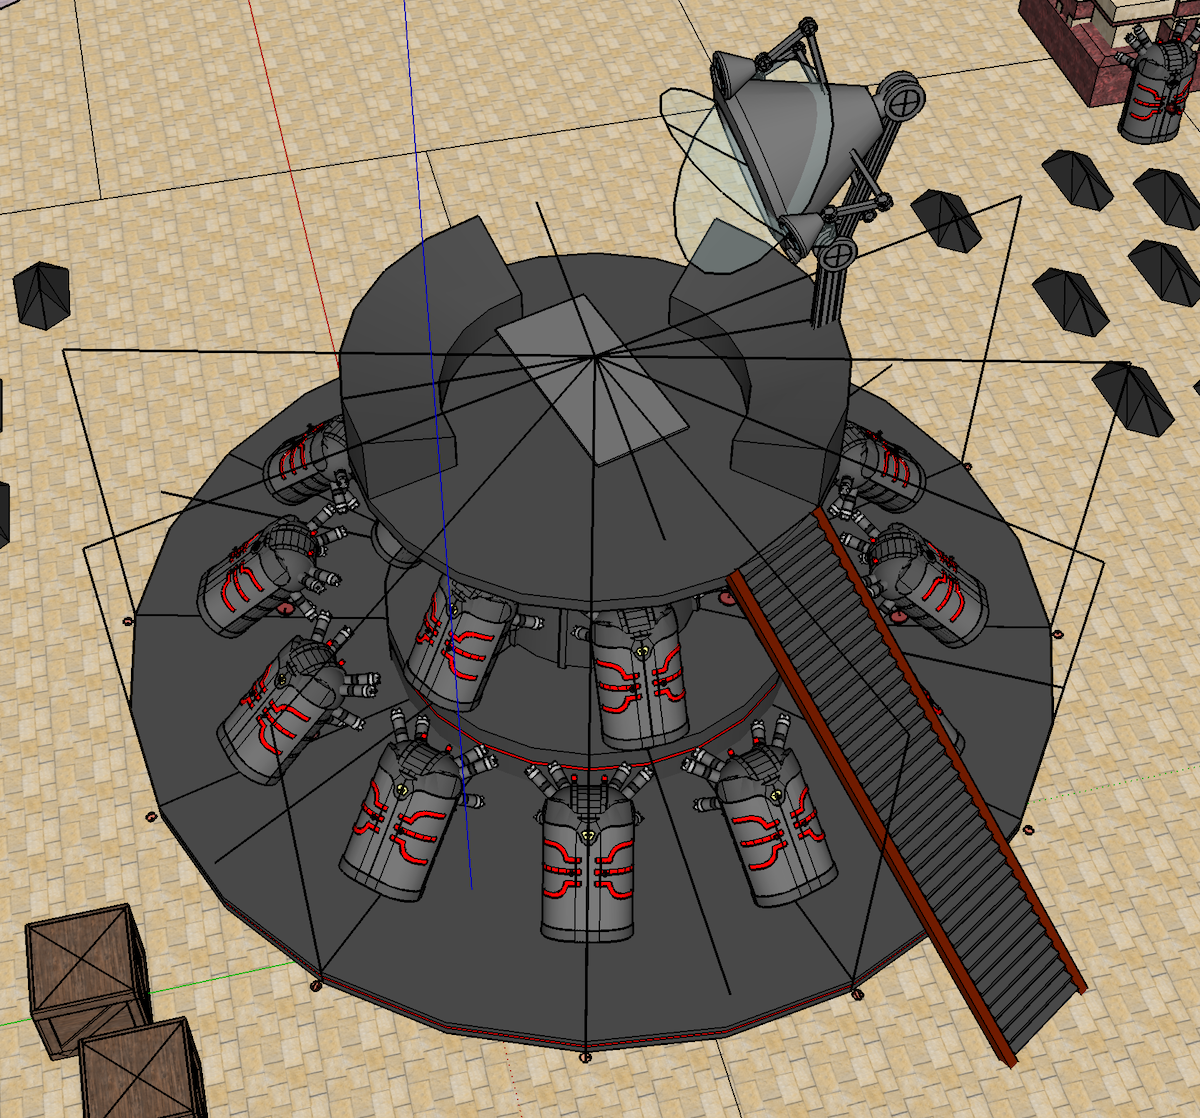
Once I’d built the pod, the central platform was easy enough to build. Because of the camera angle I was able to leave out all the detail on the control panels because it wasn’t visible in the final shot. Work smarter not harder!
Then with all the lighting set up it looked like this!
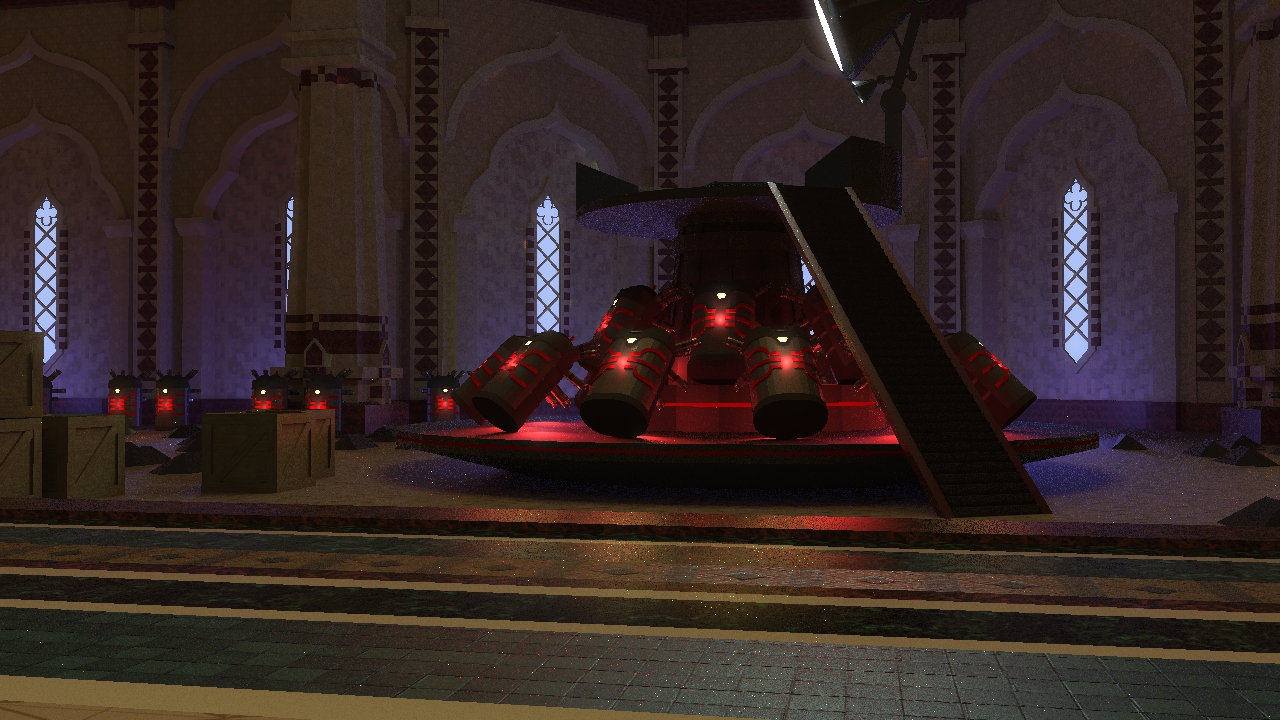
The lighting for this scene was pretty tricky so went through a bunch of iterations before I was happy with it. The bad thing about that was because of the detail and number of polygons on the pods, even preliminary renders of this scene ended up taking a long time. I had to compromise on some nice fuzzy reflections I wanted to add to the marble floor because the render was just taking too long.
There are also 5 different kinds of lights in this scene: yellow light on the pods, red light on the pods, blue light from the lamp on the central platform, spotlights on the ceiling, and blue/purple ambient light by the windows. Here’s a preliminary render with the fuzzy reflections that I really liked but just took too long when I tried to run a higher quality render.
The first background I made actually ended up not appearing in the game. Originally, the story was to start in Castrum Abania and Aulus and his team would relocate to Ala Mhigo before the WoL and the Scions took the castrum. I ended up scrapping this because it would mean I’d have to make twice as many backgrounds for two different areas.

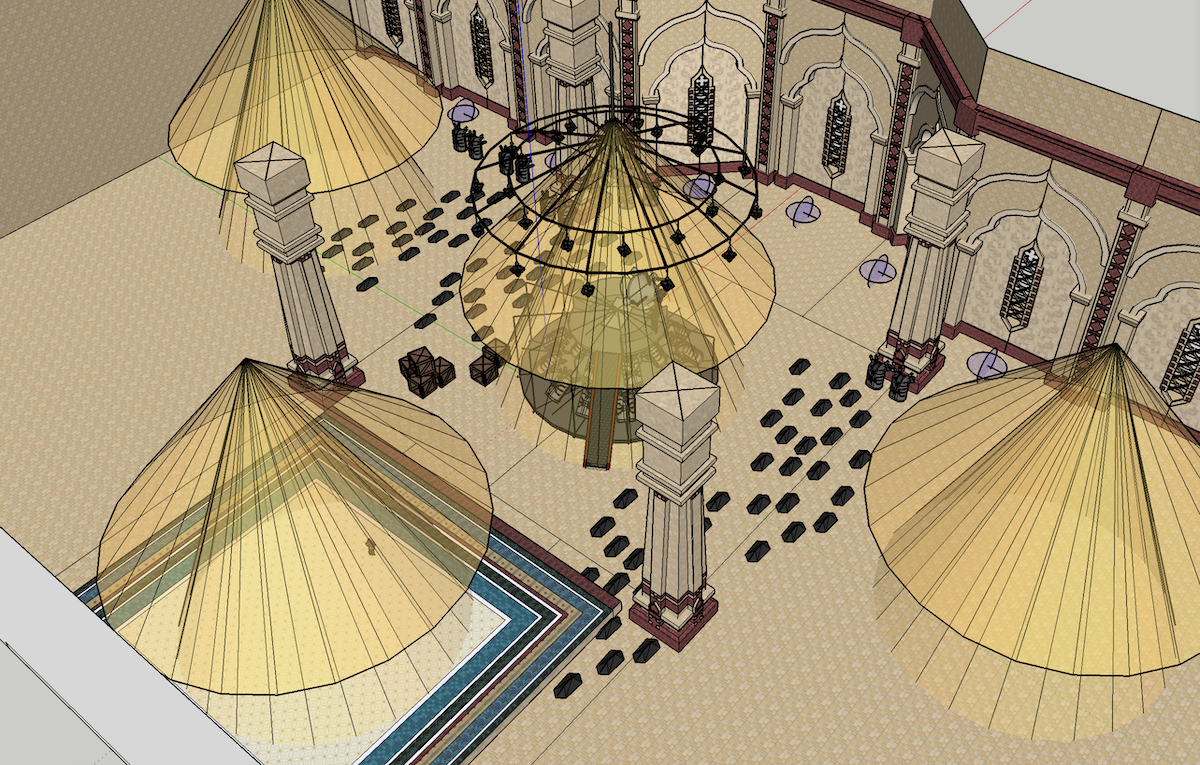
This one was pretty fun. Again, there was one repeated wall section to model and then sections for the walkway.

In the game screenshot I took there were these really cool shadows that I wanted to replicate in my own render.
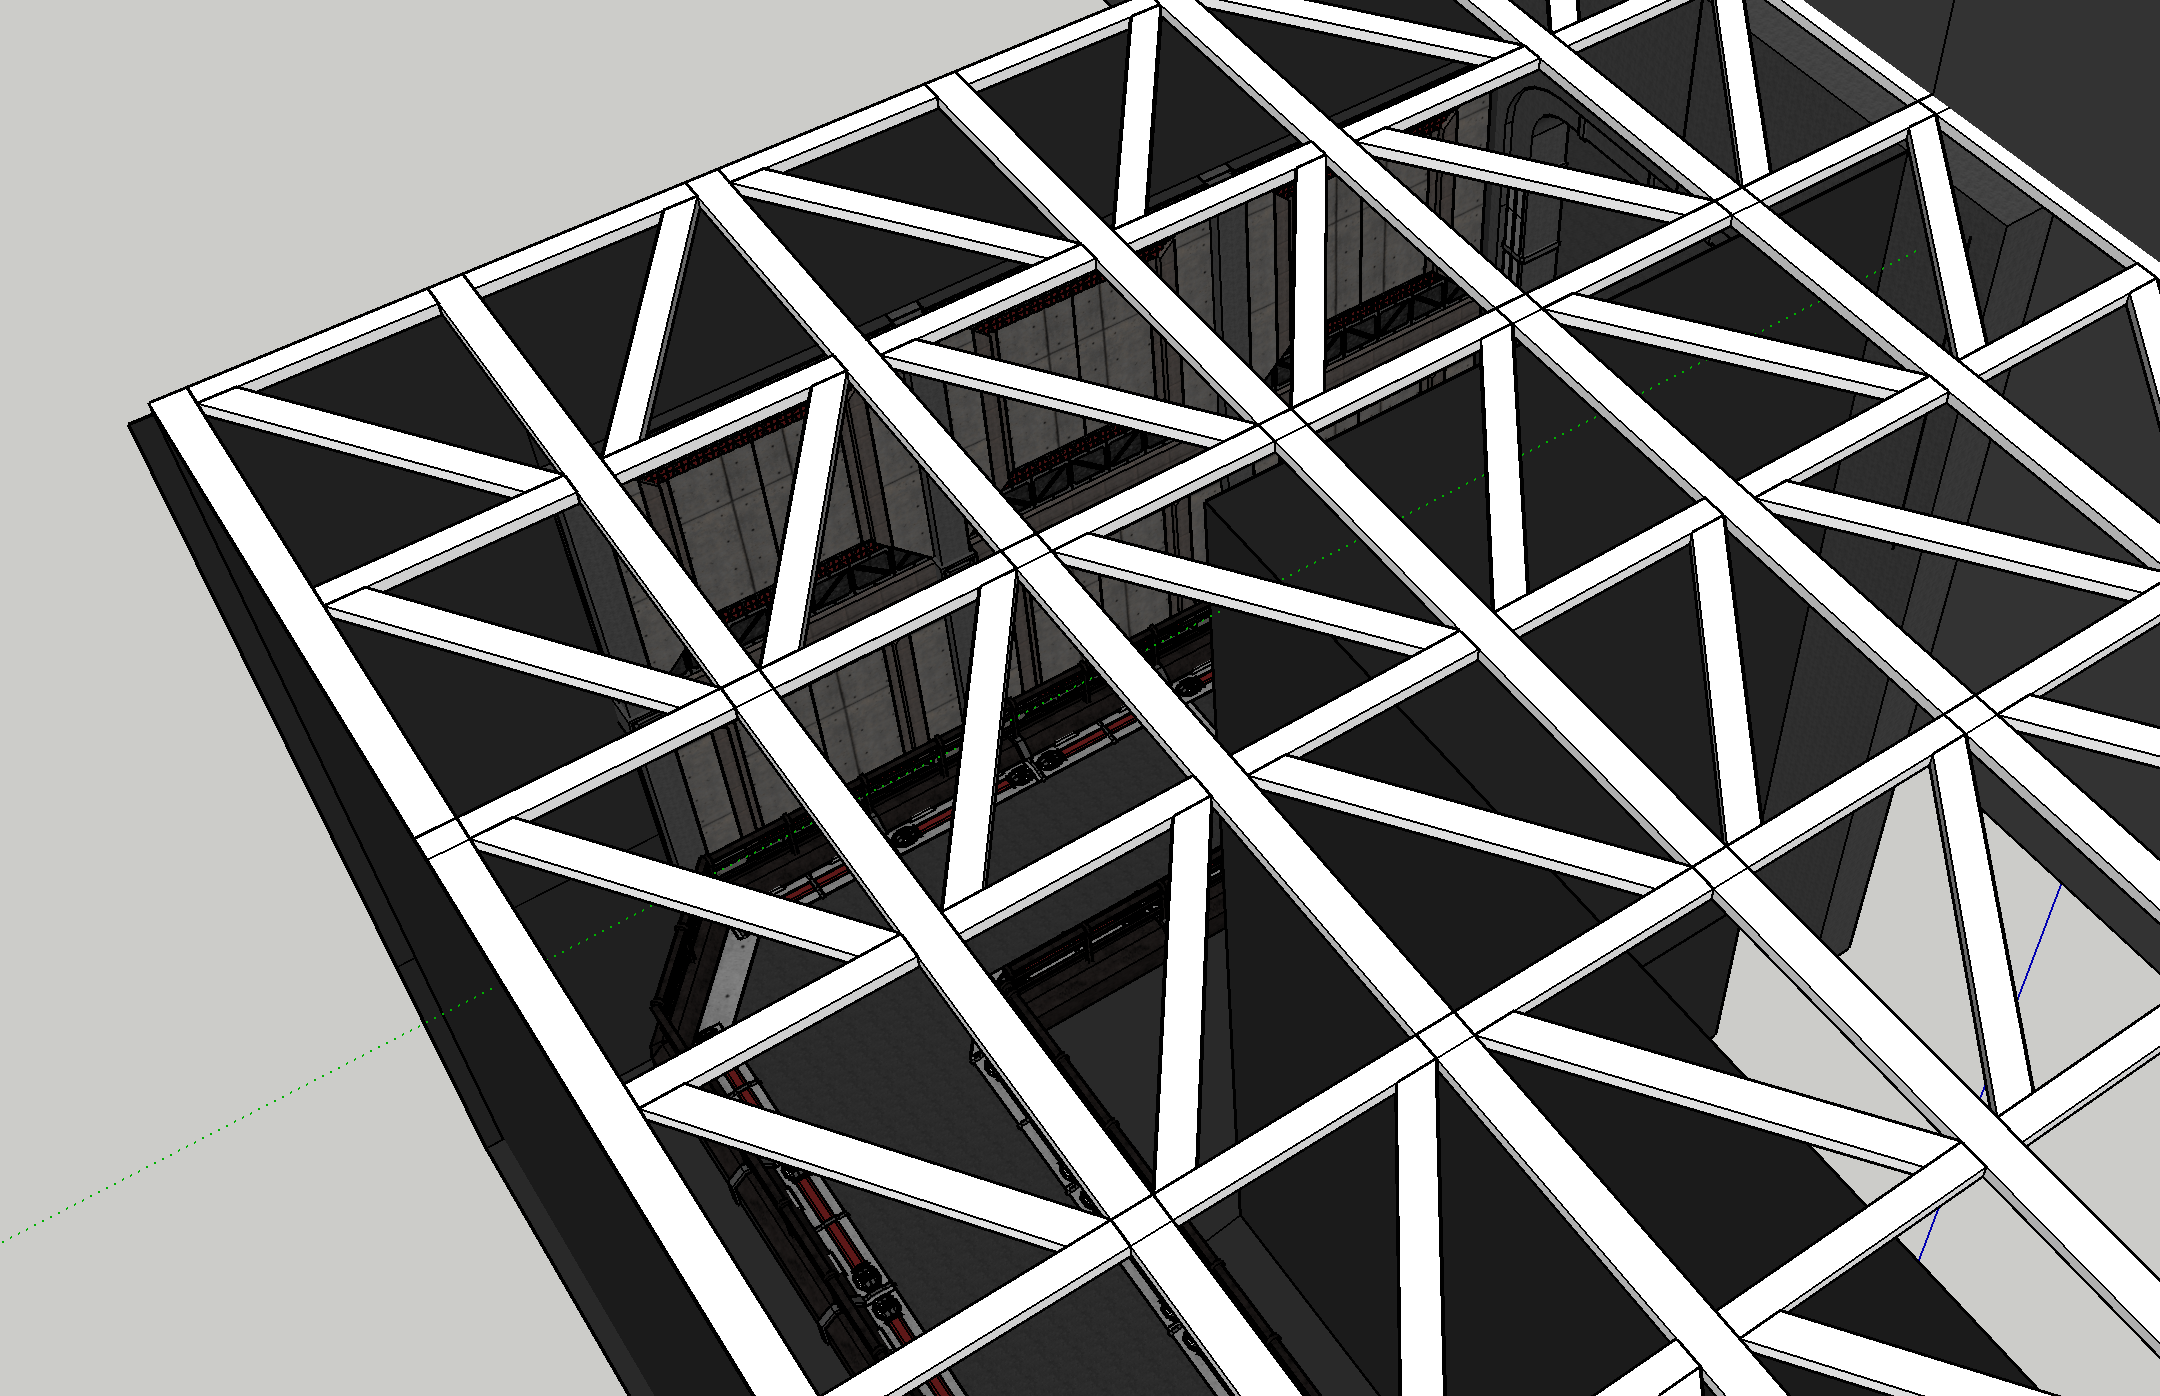
I ended up building this sort of scaffolding to put at the top of the model that would cast the kind of shadows I wanted.
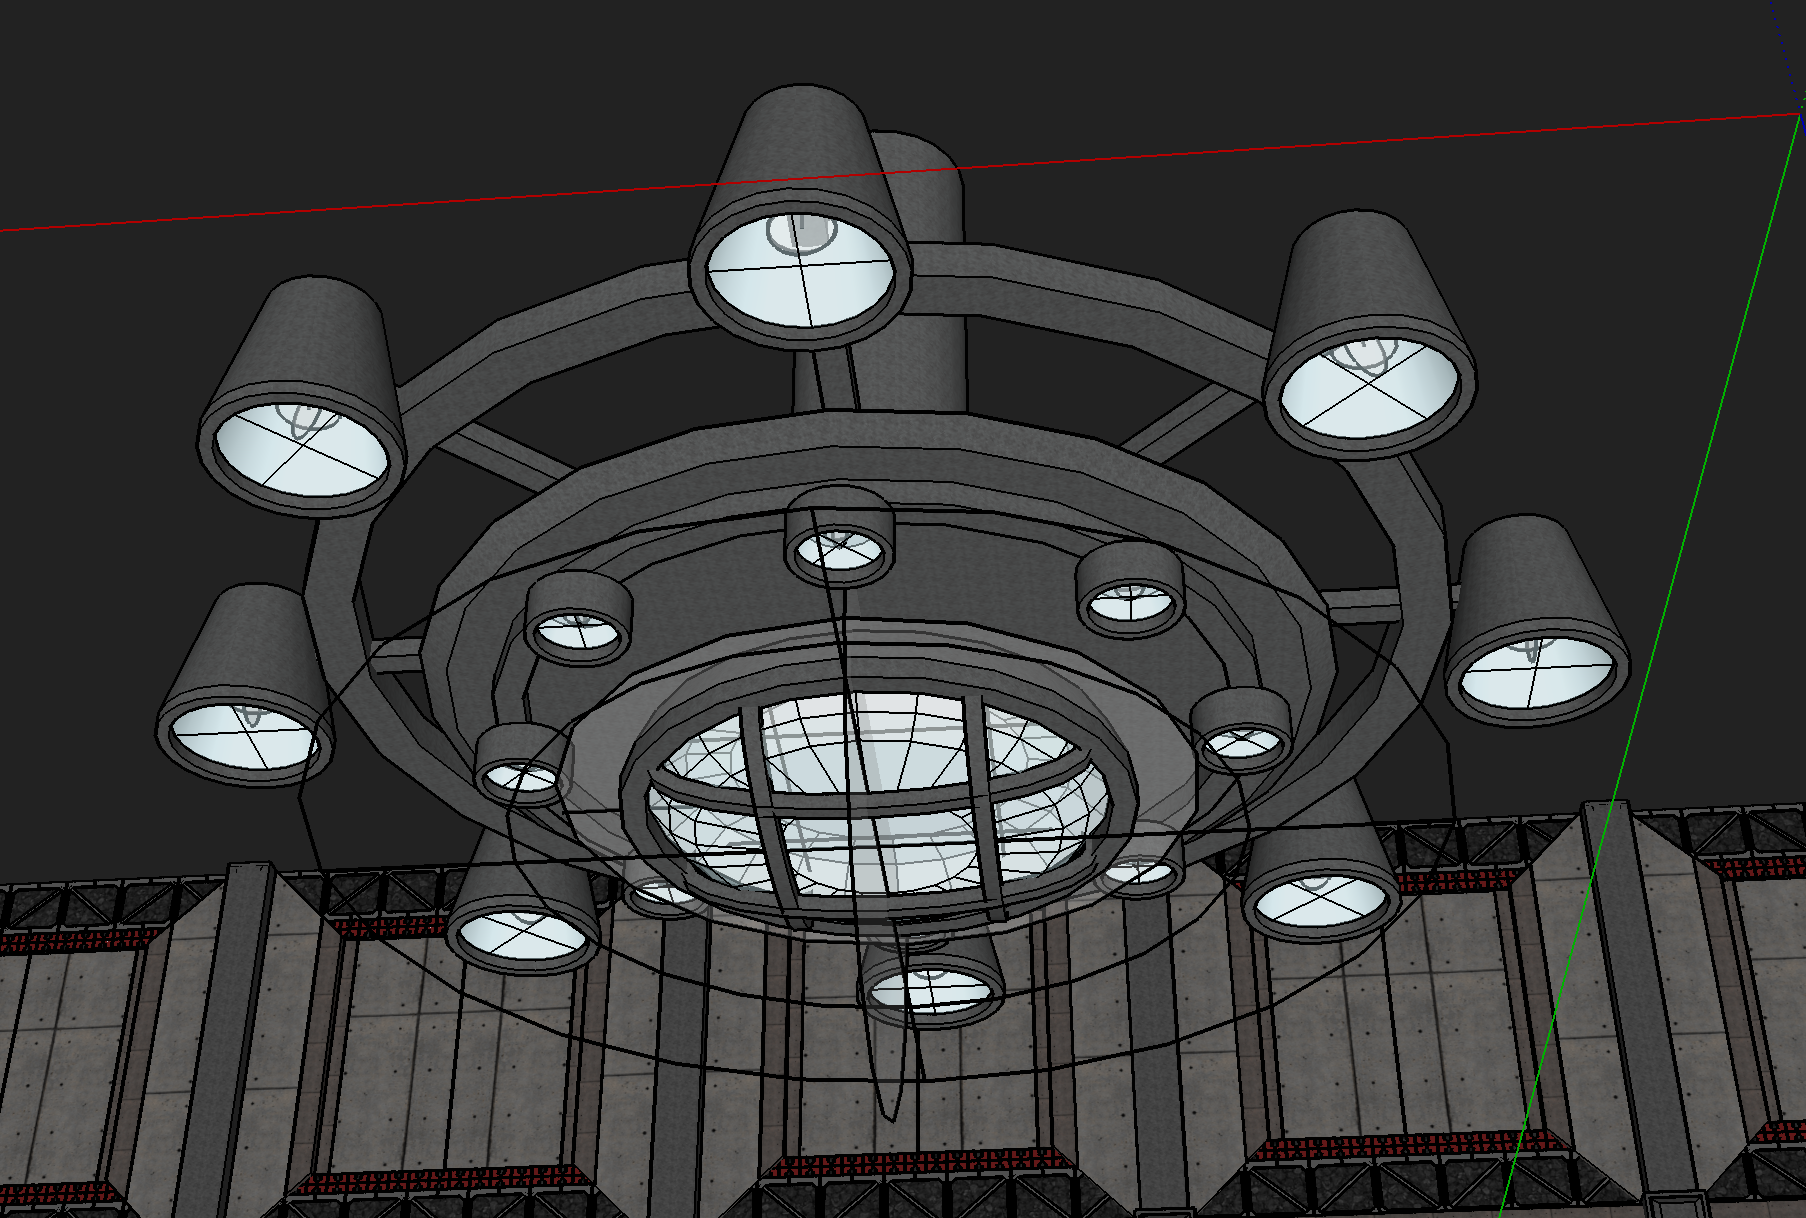
I also built this cool chandelier that I’m sad I wasn’t able to reuse anywhere else.
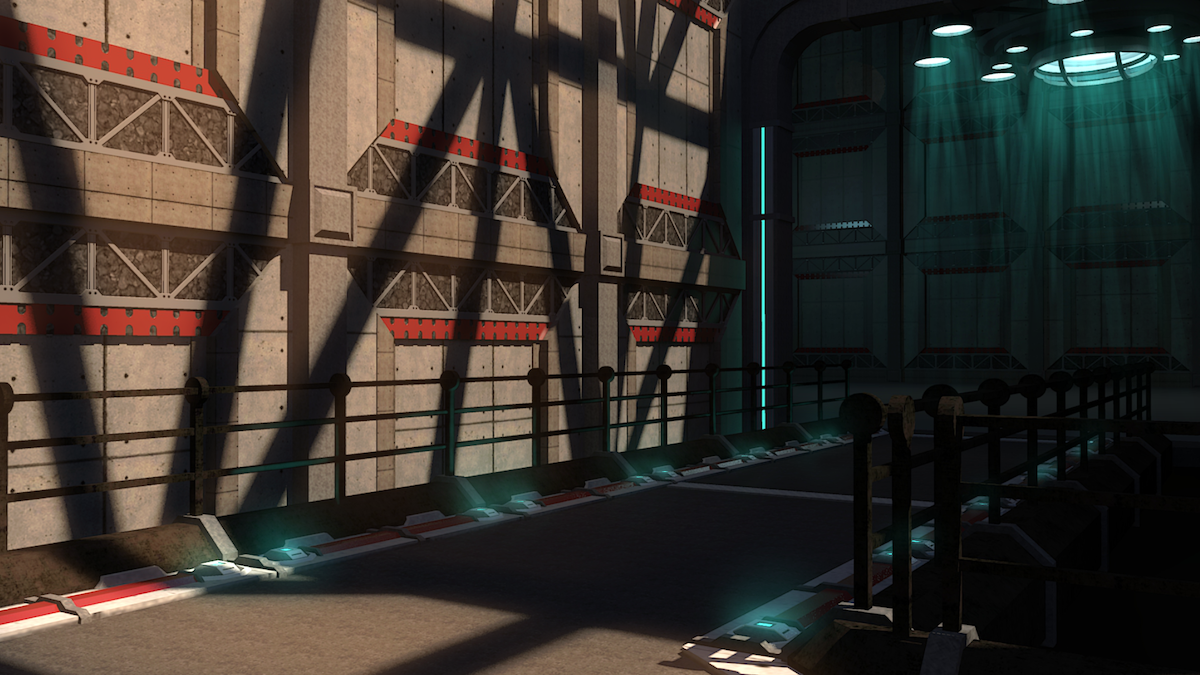
I did a lot of post-processing on this one in Clip Studio, painting in the blue lights and the beams coming from the chandelier, and adding a bit of a bloom to the sunlight coming in through the roof. (And then I realised that Twilight render plugin has a bloom effect in its own post-processing panel that I could’ve used instead!! I ended up using it for all of the renders I made after this one. A learning experience!)
For all the textures I only used the ones included in Sketchup and tweaked the hue, saturation and brightness. I’m kind of surprised how much I managed to get out of them.
Thank you for reading! I hope this was interesting!
P.S. A huge shoutout to Uncle Mugen. Without him showing what is possible with Sketchup I don’t think I ever would have got into making my own backgrounds. He provides 3D rendered backgrounds for visual novels that are free to use, as well as other useful resources. You can find them all in this Lemmasoft thread.
Leave a comment
Log in with itch.io to leave a comment.